Introduction
Hurricane season in South Florida is no joke. From June to November, strong winds and heavy rains put roofs to the ultimate test. Preparing your roof before storms arrive is the best way to protect your home and avoid expensive emergency repairs. At Everoak Roof Solutions, we specialize in hurricane-ready roofing. Here’s a step-by-step guide on how to prepare your roof for hurricane season.
The Atlantic hurricane season runs officially from June 1 through November 30, with peak activity typically occurring from mid-August through mid-October. During this period, South Florida faces the threat of tropical storms and hurricanes that can bring sustained winds exceeding 100 mph, storm surge, and torrential rainfall measured in feet rather than inches.
Your roof is your home’s first line of defense against these forces. A well-prepared, properly maintained roof can mean the difference between minor inconvenience and catastrophic damage. According to insurance industry data, roof damage is the most common claim following hurricanes, with costs often running into tens of thousands of dollars.
The good news? Most hurricane roof damage is preventable. With proper preparation, regular maintenance, and timely upgrades, you can dramatically reduce your risk. This comprehensive guide will walk you through everything you need to know to prepare your Coral Gables, Coconut Grove, or Miami home for the coming hurricane season.
Why Roof Preparation Matters
The Stakes Are High
Consider what happens when a roof fails during a hurricane:
Water Intrusion: Once the roof breaches, water pours into your home, damaging ceilings, walls, floors, furniture, and personal belongings.
Structural Damage: Prolonged water exposure weakens structural elements, potentially compromising the entire building.
Mold Growth: Within 24-48 hours of moisture exposure, mold begins growing, creating health hazards and expensive remediation needs.
Complete Roof Loss: In worst-case scenarios, the entire roof structure can fail, leaving your home completely exposed.
Secondary Damage: Water damage extends to electrical systems, HVAC equipment, and appliances.
Prevention Pays
The cost of prevention is fractions of the cost of repair. A few hundred dollars spent on inspections and minor repairs can save tens of thousands in post-storm restoration.
Peace of Mind
Beyond financial considerations, knowing your home is prepared provides invaluable peace of mind when storm warnings are issued. You can focus on other preparations rather than worrying about your roof’s vulnerability.
Understanding Hurricane Risks to Roofs
Wind Damage
Hurricane-force winds exert tremendous force on roofing materials. Understanding how wind damages roofs helps focus preparation efforts.
Wind Uplift:
Wind flowing over a roof creates pressure differences that literally lift roofing materials. This uplift force tries to pull shingles, tiles, or panels away from the deck. Once one section fails, progressive failure often follows as wind gets underneath adjacent materials.
Wind-Borne Debris:
Flying debris—tree branches, loose lumber, outdoor furniture—can impact roofs with tremendous force, puncturing materials and creating entry points for water.
Pressure Equalization:
In extreme cases, rapid pressure changes when windows or doors fail on one side of a home can create internal pressure that contributes to roof failure from underneath.
Rain Damage
Wind-Driven Rain:
Hurricane winds drive rain horizontally, forcing water into gaps and seams that would remain dry in normal conditions. Flashing details that work fine in vertical rain may fail under wind-driven conditions.
Ponding Water:
Flat and low-slope roofs may develop ponding when drainage systems are overwhelmed or clogged. Standing water adds tremendous weight and finds any vulnerability.
Sequential Failure
Often, roof failure during hurricanes follows a sequence:
Minor damage occurs (a few shingles lift)
Wind gets underneath and expands the damaged area
Water enters through compromised areas
Interior damage begins
Progressive failure continues
Breaking this sequence early—through preparation—prevents the cascade.
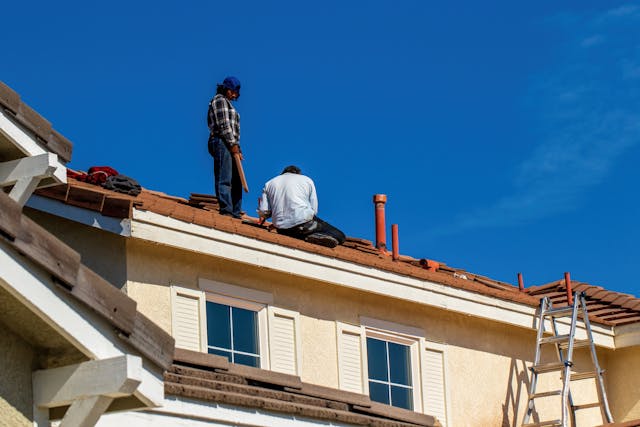
Step 1: Schedule a Professional Roof Inspection
Before hurricane season begins, have your roof inspected by professionals. A thorough inspection will identify weak spots, loose shingles, cracked tiles, or leaks that could worsen during a storm.
What a Professional Inspection Includes
Exterior Inspection:
Shingle, tile, or metal panel condition assessment
Flashing inspection at chimneys, vents, skylights, and walls
Gutters and downspouts evaluation
Ridge and hip condition
Edge metal and drip edge inspection
Moss, algae, or debris assessment
Interior Inspection:
Attic inspection for daylight or moisture
Decking condition assessment
Ventilation evaluation
Insulation condition
Signs of past or current leaks
Detailed Reporting:
Photographs of all findings
Condition assessment with priorities
Repair recommendations
Estimated remaining roof life
Cost estimates for recommended work
Timing Your Inspection
Schedule inspections well before hurricane season begins—ideally in late winter or early spring. This allows time for any necessary repairs before the busy pre-hurricane season period when contractors are inundated with requests.
DIY vs. Professional
While homeowners can spot some issues from the ground, professional inspections are essential because:
Professionals safely access the roof for close inspection
They recognize subtle signs of problems
They understand what to look for specific to hurricane vulnerability
They can assess attic conditions thoroughly
They provide documentation for insurance purposes
What Inspectors Look For Specifically Related to Hurricanes
Wind Vulnerability: Loose materials, inadequate fastening, edge details
Flashing Integrity: Condition of seals at all penetrations
Deck Attachment: How well roof deck is secured to structure
Underlayment Condition: The secondary waterproof layer beneath visible materials
Age-Related Weakness: Deterioration that may not yet be visible
Step 2: Clean Gutters and Downspouts
Clogged gutters cause water to back up and seep under shingles. Clearing debris ensures water flows away from your home during heavy rainfall.
Why Gutters Matter During Hurricanes
Hurricanes bring intense rainfall—often inches per hour. Gutters and downspouts must handle this volume efficiently. When they’re clogged:
Water backs up under roofing materials at edges
Overflowing water saturates soil next to foundation
Fascia and soffit damage occurs from trapped moisture
Ice dams (rare in Florida) but debris dams are common
Proper Gutter Maintenance
Cleaning Schedule:
Clean gutters at least twice annually
Additional cleaning before hurricane season
Clean after major storms that deposit debris
What to Remove:
Leaves and pine needles
Twigs and branches
Moss and algae
Bird nests
Granules from aging shingles (sign of wear)
Any debris that blocks flow
Inspection While Cleaning:
Check for:
Loose gutter attachments
Sagging sections
Damaged or missing downspouts
Proper slope toward downspouts
Gutter guards condition (if installed)
Gutter Improvements
Consider these upgrades for better hurricane performance:
Gutter Guards: Keep debris out while allowing water flow. Many styles available from simple screens to reverse-curve designs.
Oversized Gutters: For homes in heavily wooded areas, larger gutters handle more debris and water volume.
Additional Downspouts: Improve drainage capacity during heavy rain.
Underground Drainage: Direct water away from foundation efficiently.
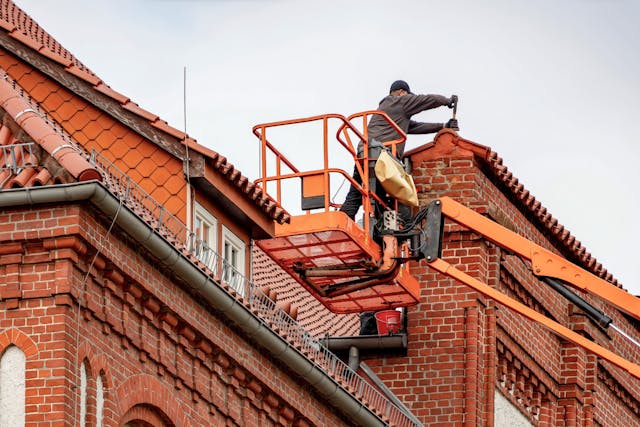
Step 3: Secure Loose Shingles and Flashing
High winds can rip off loose materials. Replacing or securing damaged shingles, flashing, and tiles will minimize the risk of storm damage.
Identifying Loose Materials
Shingles:
Curling or lifted edges
Visible nail heads
Missing shingles
Cracked or split shingles
Bald spots from granule loss
Tiles:
Cracked or broken tiles
Loose tiles that move when touched
Missing tiles
Displaced tiles from wind or foot traffic
Flashing:
Lifted or separated flashing at roof penetrations
Rusted or corroded metal
Failed sealant around edges
Gaps between flashing and roof surface
Repair vs. Replacement Decisions
Minor Issues: Individual shingle replacement, tile resetting, or flashing resealing can be performed as repairs.
Widespread Problems: If multiple issues exist across the roof, replacement may be more cost-effective than repeated repairs.
Professional Repair Benefits
While DIY repairs may seem tempting, professional work ensures:
Proper materials and techniques
Correct fastening for wind resistance
Matching appearance
Warranty protection
Safety (roof work is dangerous)
The Cost of Delay
Each loose shingle or flashing gap represents a potential failure point during a hurricane. The small cost of securing them now is negligible compared to the damage one can cause during a storm.
Step 4: Trim Nearby Trees
Overhanging branches can snap during strong winds and puncture your roof. Trimming them back reduces the risk of falling debris.
Tree Risks During Hurricanes
Direct Impact: Branches or entire trees falling on roofs cause immediate, often catastrophic damage.
Scraping Damage: Branches rubbing against roofs during wind remove protective granules and abrade materials.
Debris Accumulation: Leaves and small branches clog gutters and accumulate in roof valleys, holding moisture.
Access for Pests: Overhanging branches provide pathways for rodents and insects onto roofs.
Proper Tree Trimming
Distance Guidelines:
No branches should overhang the roof
Maintain at least 10 feet clearance from roof edges
Keep branches away from power lines (professional only)
What to Trim:
Dead or dying branches (most likely to fall)
Branches that cross or rub against each other
Limbs that extend over the roof
Branches touching or near the house
Professional vs. DIY:
Large trees and branches near houses or power lines require professional arborists. Small branches away from hazards may be DIY with proper safety equipment.
Tree Health Considerations
Healthy trees are less likely to fail during hurricanes. Consider:
Regular tree inspections by arborists
Treatment for diseases or pests
Removal of trees with structural problems
Proper pruning techniques that maintain tree health
Landscaping Beyond Trees
Also consider:
Securing loose potted plants
Storing outdoor furniture
Removing hanging plants during storms
Securing yard decorations
Step 5: Install Hurricane Straps and Fasteners
For older roofs, reinforcing them with hurricane straps or additional fasteners provides extra wind resistance. This small investment can prevent major roof failures.
Understanding Roof-to-Wall Connections
Your roof’s connection to the walls is critical during hurricanes. Wind trying to lift the roof must overcome this connection. In older homes, connections may be inadequate by modern standards.
Common Connection Types:
Toe-Nailed Rafters: Rafters nailed at an angle through the wall top plate—least secure
Hurricane Clips: Metal connectors that secure rafters to wall plates—much stronger
Hurricane Straps: Straps that wrap from rafter to wall stud—strongest connection
Retrofitting Options
Hurricane Clips:
Install on each rafter/truss where it meets the wall
Provide substantial uplift resistance
Relatively low cost for the protection provided
Can be installed without removing roofing
Hurricane Straps:
More comprehensive than clips
Connect rafter to wall stud below
Require some interior access
Highest level of protection
Deck Attachment:
Ensure roof deck (plywood/OSB) is adequately nailed
8d nails at 6-inch spacing recommended
Consider screws for additional security
Code Requirements
Modern Florida Building Code requires specific fastening schedules and connectors. If your home predates current codes, retrofitting brings it closer to modern standards.
Professional Assessment
A structural assessment can determine:
Current connection adequacy
Appropriate retrofit options
Cost vs. benefit analysis
Priority areas for reinforcement
Step 6: Check Attic Ventilation
Proper ventilation helps regulate air pressure during storms. Poor ventilation can cause uplift, making your roof more vulnerable.
How Ventilation Affects Hurricane Performance
Pressure Equalization:
During hurricanes, wind flowing over a roof creates negative pressure (suction) above the roof. If attic ventilation is inadequate, this pressure differential can literally lift the roof deck.
Ventilation Types:
Ridge Vents: Continuous vent along roof peak
Soffit Vents: Intake vents under eaves
Gable Vents: Vents in end walls
Turbine Vents: Wind-driven rotating vents
Power Vents: Electric fans (not ideal during power outages)
Balanced Ventilation Requirements
Proper ventilation requires balanced intake (soffit vents) and exhaust (ridge or gable vents). The general rule is 1 square foot of ventilation per 300 square feet of attic floor, with half intake and half exhaust.
Signs of Poor Ventilation
Excessive attic heat (significantly hotter than outside)
Moisture or frost in attic during winter
Mold or mildew on roof deck
Ice dams (rare in Florida but indicates problems)
High energy bills
Ventilation Upgrades
Consider these improvements before hurricane season:
Install ridge vents if currently lacking
Ensure soffit vents aren’t blocked by insulation
Add additional vents if undersized
Upgrade to continuous ridge vent systems
Step 7: Consider Impact-Resistant Materials
If you’re planning a roof replacement, opt for impact-resistant shingles or metal roofing. These materials are specifically designed for hurricane-prone regions.
Impact-Resistant Shingles
Modern impact-resistant shingles are tested to withstand hail and debris impact. They feature:
Modified Asphalt: More flexible, less brittle
Reinforced Mat: Stronger backing material
Enhanced Granule Adhesion: Better granule retention
Class 4 Rating: Highest impact resistance rating
Benefits:
Better wind resistance
Reduced granule loss
Longer lifespan
Insurance discounts (often)
Metal Roofing for Hurricane Zones
Metal roofing offers exceptional hurricane performance:
Standing Seam Metal:
Interlocking panels resist wind uplift
Concealed clips provide secure attachment
Smooth surface reduces wind pressure
140+ mph wind ratings common
Metal Shingles and Tiles:
Look like traditional materials
Provide metal’s durability
Interlocking design for wind resistance
Lightweight compared to tile
Other Hurricane-Resistant Options
Concrete and Clay Tile:
Excellent wind resistance when properly installed
Heavy weight requires adequate structure
Mortar or clip attachment systems available
Synthetic Slate/Shake:
Polymer materials resist impact
Lighter than natural materials
Interlocking options available
Timing Considerations
If your roof is approaching end of life, replacing before hurricane season offers maximum protection. However, quality installation takes time—don’t wait until June to start this process.
Step 8: Review Insurance Coverage
Make sure your homeowner’s insurance covers storm damage. Keep records of your roof’s condition with photos before hurricane season begins.
Understanding Your Coverage
Dwelling Coverage: Ensure your policy limit is adequate to rebuild your home at current construction costs.
Deductibles: Florida policies often have separate, higher deductibles for hurricane damage—typically 2-5% of dwelling coverage.
Actual Cash Value vs. Replacement Cost: Some policies pay only depreciated value for older roofs. Know which you have.
Ordinance and Law Coverage: Covers additional costs to bring your roof up to current code when replacing.
Documentation Before Storms
Photograph Your Roof:
Take dated photos showing current condition
Document any recent repairs or maintenance
Photograph from multiple angles
Consider drone photos for complete documentation
Keep Records:
Roof age and material type
Installation documentation
Repair history
Inspection reports
Maintenance records
Filing Claims After Storms
If damage occurs:
Document everything with photos
Make temporary repairs to prevent further damage
Contact your insurance company promptly
Work with professional contractors for assessments
Keep all receipts and documentation
Common Insurance Issues
Denied claims due to lack of maintenance
Low settlements based on depreciated values
Deductible confusion about hurricane deductibles
Coverage gaps for code upgrades
Additional Hurricane Preparation Steps
Create a Hurricane Plan
Before Storm:
Know your evacuation zone
Prepare emergency supplies
Secure loose outdoor items
Charge devices and backup batteries
Fill vehicles with fuel
During Storm:
Stay indoors away from windows
Monitor official communications
Don’t go outside during calm (eye of storm)
Have battery-powered radio
After Storm:
Wait for official all-clear
Document damage before any cleanup
Make temporary repairs if safe
Contact insurance and contractors
Emergency Repair Kit
Consider having these items available:
Heavy-duty tarp (several sizes)
Roofing cement or sealant
Hammer and roofing nails
Plywood for temporary patches
Buckets for catching leaks
Rope and safety equipment
Professional Contacts
Save these numbers before hurricane season:
Everoak Roof Solutions emergency line
Your insurance agent
Tree service
Water damage restoration company
General contractor
Special Considerations by Roof Type
Asphalt Shingle Roofs
Pre-Season Checklist:
Check for loose or missing shingles
Inspect granule loss
Verify flashing integrity
Check ridge cap attachment
Ensure proper attic ventilation
Hurricane Vulnerabilities:
Shingle lifting at edges
Granule loss exposing asphalt
Age-related brittleness
Flashing failures at penetrations
Tile Roofs
Pre-Season Checklist:
Check for cracked or broken tiles
Verify mortar or clip attachment
Inspect ridge and hip tiles
Check underlayment condition
Ensure flashings are intact
Hurricane Vulnerabilities:
Broken tiles from debris
Lifted tiles allowing water entry
Mortar failure on ridges
Underlayment exposure where tiles missing
Metal Roofs
Pre-Season Checklist:
Check fastener tightness
Inspect seam integrity
Verify flashing condition
Check for loose panels
Inspect sealant at penetrations
Hurricane Vulnerabilities:
Loose fasteners
Seam separation
Flashing failures
Panel attachment issues
Flat Roofs
Pre-Season Checklist:
Check membrane condition
Verify drain clearance
Inspect flashings at walls
Check for blisters or bubbles
Ensure proper slope for drainage
Hurricane Vulnerabilities:
Ponding water adding weight
Membrane lifting at edges
Drain blockage
Flashing separation
Service Areas: Where Everoak Roof Solutions Can Help
Everoak Roof Solutions proudly serves homeowners throughout South Florida with hurricane preparation services:
Coral Gables
Coral Gables features beautiful homes with diverse architectural styles, from historic Mediterranean revivals to contemporary masterpieces. Our team understands the unique needs of Coral Gables properties and provides hurricane preparation services tailored to each home’s specific characteristics.
Services in Coral Gables:
Pre-hurricane roof inspections
Shingle and tile repair
Flashing replacement
Gutter cleaning and repair
Hurricane strap installation
Emergency repair services
Coconut Grove
Coconut Grove’s waterfront location presents specific challenges for hurricane preparation. Salt air, high humidity, and direct storm exposure require specialized attention.
Services in Coconut Grove:
Coastal-specific inspections
Corrosion-resistant material recommendations
Enhanced flashing details
Tree trimming services
Impact-resistant roofing options
24/7 emergency response
Miami
As a leading roofing company in Miami, we serve residential properties throughout the city. From Brickell high-rises to Coral Way bungalows, we provide comprehensive hurricane preparation.
Miami Neighborhoods We Serve:
Brickell and Downtown Miami
Edgewater and Wynwood
Coral Way and Shenandoah
Westchester and Kendall
Doral and Airport West
All Miami-Dade County communities
When to Start Hurricane Preparation
Ideal Timeline
January-February:
Schedule professional roof inspection
Begin planning any major repairs
March-April:
Complete identified repairs
Trim trees and landscaping
Clean gutters thoroughly
May:
Final inspection before June 1
Review insurance coverage
Prepare emergency supplies
Document roof condition with photos
June-November:
Monitor storm forecasts
Stay prepared
Contact us immediately if damage occurs
What to Do When a Storm Approaches
48-72 Hours Out:
Clear gutters one last time
Secure loose outdoor items
Review emergency plan
Charge devices
24-48 Hours Out:
Take final photos of property
Implement storm preparations
Evacuate if advised
Conclusion
Preparing your roof for hurricane season is not just about preventing leaks—it’s about safeguarding your home and family. By following these steps, you’ll reduce risks and gain peace of mind when storms arrive.
Key Takeaways
Professional inspection is the foundation of hurricane preparation
Regular maintenance prevents small problems from becoming major failures
Gutter cleaning ensures water drains properly during heavy rain
Loose materials must be secured before they can become projectiles
Tree trimming removes potential impact hazards
Hurricane straps provide critical structural reinforcement
Proper ventilation reduces wind uplift risk
Impact-resistant materials offer superior protection
Insurance review ensures you’re properly covered
Documentation protects your claim if damage occurs
The Everoak Roof Solutions Difference
At Everoak Roof Solutions, we’re committed to helping South Florida homeowners prepare for hurricane season. Our team provides:
Thorough Inspections: Comprehensive assessments that identify every vulnerability
Quality Repairs: Professional work that stands up to storms
Expert Guidance: Honest advice about your roof’s condition and needs
Emergency Response: 24/7 availability when storms cause damage
Local Knowledge: Understanding of South Florida’s unique requirements
Take Action Today
Don’t wait until a hurricane is approaching to think about your roof. By then, it’s too late for many preparations, and contractors are overwhelmed with emergency calls.
Contact Everoak Roof Solutions today to schedule your pre-hurricane roof inspection. Our team will assess your roof’s condition, identify any vulnerabilities, and recommend necessary repairs—all before hurricane season arrives.